09.09.2024
How Flutter Revolutionizes Mobile App Development: A Look at the Most Important Functions.Hands on: An Introduction to Flutter.
Today we take you on an exciting journey into the world of mobile app development with Flutter. We present "blue_todo", a small but elegant Todo app that shows how powerful and versatile Flutter can be. In this article, you'll not only get an insight into the basics of Flutter but also a small Deep Dive into Best Practices. Let's take a look together at the technology and design behind "blue_todo"!
Introduction
Have you ever had the urge to write code and carry it everywhere? If yes, then you've probably already tried frameworks like React Native and Flutter. And if not, then this article is exactly right for you!
In this article, we will explore the amazingly and rapidly developing world (almost as fast as JS framework development) of multi-platform frameworks. Today's showcase: Flutter.
I'll begin with a brief summary of Flutter's history and advantages. Then I'll transition to a small app example that runs natively on Linux and end the article with a small note on why you should come to us for your next app project.
History and Advantages
After initial explorations already in 2015, Flutter was published in 2017 with support for Android and iOS. In 2019, the Flutter team began supporting web and desktop platforms. Since then, the Flutter framework itself and its ecosystem have grown and developed into a truly unified experience across all platforms. Some of the most recent improvements include the new Impeller rendering engine and WebAssembly support for web.
Flutter is a novelty in the world of UI frameworks! It delivers applications with their own rendering engine that outputs pixel data directly on the screen. This stands in contrast to many other frameworks that rely on the target platform to provide a rendering engine. Native Android apps are dependent on the Android SDK on devices, while React Native dynamically uses the integrated UI stack of the target platform. Flutter's control over the rendering pipeline is a decisive factor in supporting multiple platforms. It allows developers to use identical UI code for all target platforms, making the creation of cross-platform applications easier than ever!
Moreover, the framework offers a JIT compiler that processes code changes in seconds, providing excellent DX. This enables faster prototyping and easier testing of functionalities.
Another advantage is that Flutter is built on the Dart language. This language offers a typesafe environment. It uses a mix of static type checking and type inference, with type annotations being optional. The Dart compiler also has a built-in null check that directly eliminates all possible null/none errors in the IDE.
And last but not least: Flutter has a great community with a variety of plugins that can be easily used via the built-in package manager pub.
Flutter Hands-On
For this blog article, I want to build a small Todo app (what else?) that runs natively under Linux. Flutter has excellent integration with Firebase (Google's platform for easy app development) or other similar Cloud Infrastructure as a Service (CIaaS) products like Supabase. But for this example, I want the app to use a local database. Specifically one of my favorite NoSQL databases: ObjectBox. It supports Dart / Flutter and is built for speed.
Flutter Setup
Before you can start developing your apps, the Flutter SDK must be installed. This varies from platform to platform, but a good starting point is the SDK Installation Page of the Flutter project. If you're as lazy as I am, I recommend version-fox. This is an SDK version manager written in GoLang. After installing and configuring version-fox, you can execute the following commands to add the Flutter plugin and install the SDK:
vfox add flutter
vfox search flutter // this will open a selection with all available flutter versions
vfox use -g flutter@{use your version here}
After executing these commands, you can get started! To verify if everything worked, you can execute the following command:
flutter doctor -v
This command will provide some information about your current Flutter installation. Depending on your platform, you might need to install some development packages. Please consult the SDK installation site to find the right packages.
Project Start
The entire code created for this project can be found in this Github Repository.
Flutter has (like Django) management commands to quickly create projects and other templates, like Plugins. The following command can be used to create a new project with the base template:
flutter create --org de.blueshow blue_todo
This command creates a new project with the following folder structure in blue_todo:
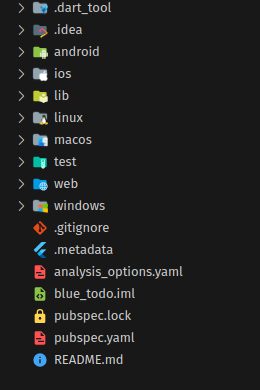
As you can see, Flutter automatically created directories for all supported platforms. We will only use the lib and linux directories. lib contains the dart- and platform-independent code, while linux contains the platform-specific Linux code. Flutter offers communication with native functions and libraries through so-called "Platform-Channels". These are a powerful tool to use native functionality and performance. An explanation of these would admittedly exceed the scope of this article. But maybe a new article will come soon?
Next, we'll install a few dependencies! You can search for these on pub.dev.
flutter pub add objectbox objectbox_flutter_libs:any flutter_bloc gap intl
flutter pub add --dev build_runner objectbox_generator:any
This adds the required ObjectBox dependencies and build_runner to generate ObjectBox code. Additionally, flutter_bloc is installed, a Business Logic Controller (BLoC) implementation for Flutter. BLoC enables easier and better State Management (we'll talk later about what State Management exactly is).
Additionally, the Gap- and Intl-dependencies are installed. Gap is a very helpful widget for arranging widgets in a column or row. And intl enables formatting a date.
Project Implementation
Now let's dive into the code! The standard file main.dart contains the following implementation of a Counter-App:
import 'package:flutter/material.dart';

void main() {
 runApp(const

class MyApp extends StatelessWidget {
 const MyApp({super.key});

 // This widget is the root of your application.
 @override
 Widget build(BuildContext context) {
   return MaterialApp(
     title: 'Flutter Demo',
     theme: ThemeData(
       colorScheme: ColorScheme.fromSeed(seedColor: Colors.blue),
       useMaterial3: true,
     ),
     home: const MyHomePage(title: 'Flutter Demo Home Page'),
   );
 }
}

class MyHomePage extends StatefulWidget {
 const MyHomePage({super.key, required this.title});

 final String title;

 @override
 State<MyHomePage> createState() => _MyHomePageState();
}

class _MyHomePageState extends State<MyHomePage> {
 int _counter = 0;

 void _incrementCounter() {
   setState(() {
     _counter++;
   });
 }

 @override
 Widget build(BuildContext context) {
   return Scaffold(
     appBar: AppBar(
       backgroundColor: Theme.of(context).colorScheme.inversePrimary,
       title: Text(widget.title),
     ),
     body: Center(
        child: Column(
         mainAxisAlignment: MainAxisAlignment.center,
         children: <Widget>[
           const Text(
             'You have pushed the button this many times:',
           ),
           Text(
             '$_counter',
             style: Theme.of(context).textTheme.headlineMedium,
           ),
         ],
       ),
     ),
     floatingActionButton: FloatingActionButton(
       onPressed: _incrementCounter,
       tooltip: 'Increment',
       child: const Icon(Icons.add),
     ),
   );
 }
}
This code covers all the fundamental principles of how to create a Flutter application. Flutter is based on widgets. Widgets are the building blocks of the user interface, and everything else (your business logic) is controlled via state. State makes your application reactive and interactive. In the Flutter example, we have a FloatingActionButton (FAB) (a widget from the Material Design library). When pressed, it increments a counter variable. The framework is responsible for regenerating its state when setState is called, and shows the incremented counter.
Then let's run flutter run -d linux and see what the example looks like:
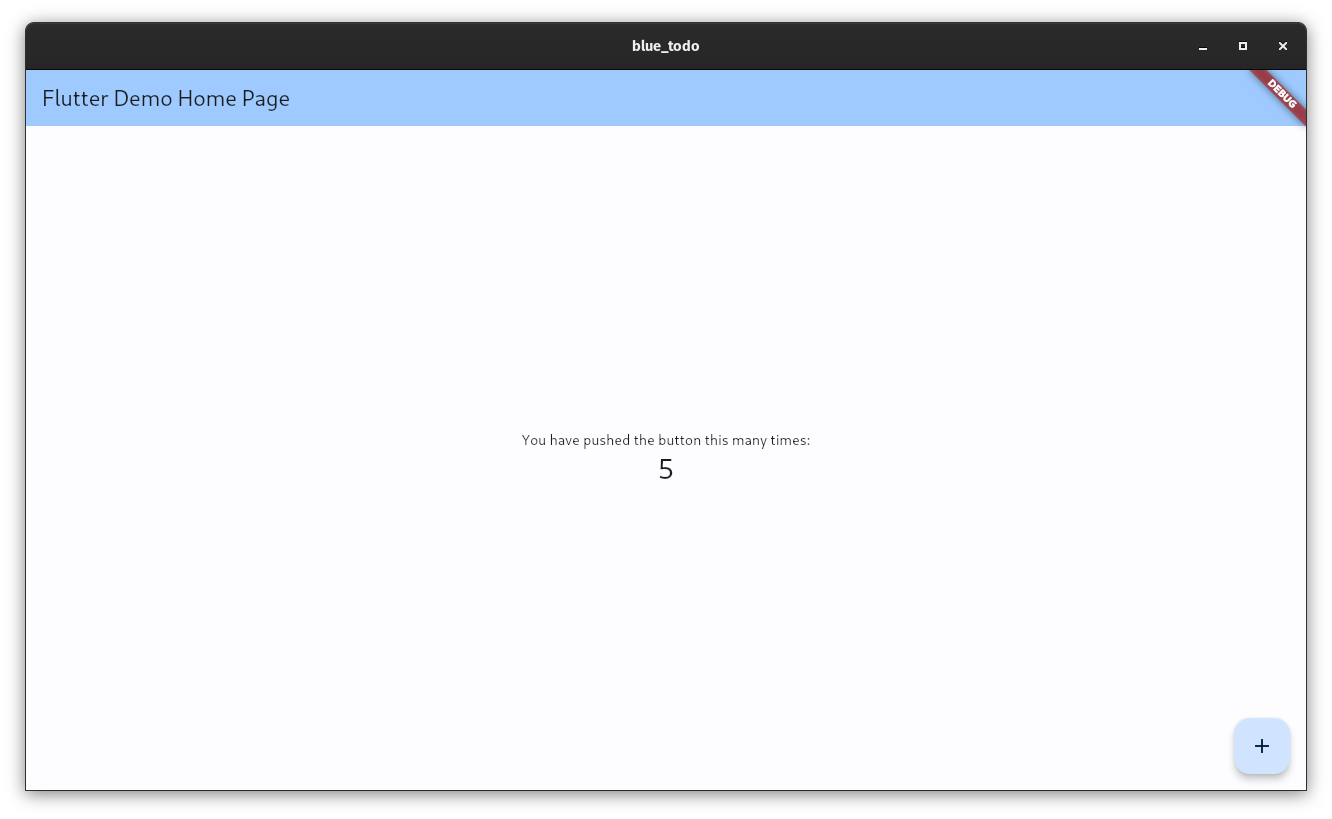
As seen in the screenshot, I pressed the FAB 5 times and the user interface was updated to show this. Flutter also shows a nice debug banner to indicate that I started the application in debug mode.
Let's now start implementing our Todo app! First, I will create a new directory called business_logic. This directory will host our Flutter BLOC code. Two more directories will follow named models and components. In a larger app, this is what it would look like.
Directory structure naturally differs. But for this small Single Page Application Project, this is sufficient. After the directories, we add the Business Logic Code: We will use a so-called Cubit in this example. You can imagine a Cubit as a less complex BLoC. First, we must define the States of the Cubit:
// todo_state.dart
part of 'todo_cubit.bloc.dart';

sealed class TodoState extends Equatable {
  const TodoState();

  @override
  List<Object> get props => [];
}

final class TodoInitial extends TodoState {}

final class TodoLoading extends TodoState {}

final class TodoDone extends TodoState {
  final List<Todo> todos;

  const TodoDone(this.todos);

  @override
  List<Object> get props => [
        todos,
      ];
}

// in case anything goes wrong
final class TodoFailed extends TodoState {}
States are classes used by Cubit to distinguish between its current state. The state change in Cubit will be reflected in the user interface, and you should display different things for various states.
After that, we can add our Cubit:
// todo_cubit.bloc.dart
import 'package:blue_todo/models/todo.dart';
import 'package:blue_todo/objectbox.g.dart';
import 'package:equatable/equatable.dart';
import 'package:flutter_bloc/flutter_bloc.dart';

part 'todo_state.dart';

class TodoCubit extends Cubit<TodoState> {
  final Box todoBox;

  TodoCubit({required this.todoBox}) : super(TodoInitial()) {
    loadTodos();
  }

  loadTodos() async {
    emit(TodoLoading());

    try {
      final todos = List<Todo>.from(await todoBox.getAllAsync());
      emit(TodoDone(todos));
    } catch (ex) {
      emit(TodoFailed());
    }
  }

  addTodo(Todo todo) async {
    final state = this.state;

    if (state is TodoDone) {
      final id = await todoBox.putAsync(todo);
      todo.id = id;
      emit(
        TodoDone(
          [
            todo,
            ...state.todos,
          ],
        ),
      );
    }
  }

  deleteTodo(Todo toDelete) async {
    final state = this.state;

    if (state is TodoDone) {
      await todoBox.removeAsync(toDelete.id);
      emit(
        TodoDone(
          state.todos.where((t) => t.id != toDelete.id).toList(),
        ),
      );
    }
  }
}
There's a lot to see, so let's look at the code step by step. Starting with the Cubit constructor. It is initialized with the database and the initial state TodoInitial. This can be any state you can define. It also calls loadTodos as soon as it is initialized.
loadTodos first "emits" TodoLoading, which should signal that we are waiting for data or doing something in the background. emit is the method to change states in a BLoC/Cubit. Then loadTodos fetches all Todos.
There are two more methods in Cubit: addTodo and deleteTodo. These methods serve to add or remove a todo. Both check whether we are in the correct state before performing their respective actions. If the state does not match, it would be wise to add an error handling or give the user a hint that something went wrong.
With this, the entire logic that we need is complete!
Now we can add the UI code. The complete UI code can be viewed here.
Otherwise, it is most important to understand how we can use BlocProvider and BlocBuilder to modify the UI, depending on the TodoState.
Let's look at the following code section:
BlocBuilder<TodoCubit, TodoState>builder: (context, state) {
  if (state is TodoInitial || state is TodoLoading) {
    return const Center(
      child: CircularProgressIndicator.adaptive(),
    );
  }

  if (state is TodoFailed) {
    return const Center(
      child: Text("Failed to load ToDo's :("),
    );
  }

  final doneState = state as TodoDone;

  if (doneState.todos.isEmpty) {
    return const Text(
      "No ToDo's added yet. Add some via the bottom right FloatingActionButton!",
    );
  }

  ...
}
As you can see, the BlocBuilder widget is used to distinguish between TodoStates. For each state, we return something different and contextually relevant. You can also check other things besides the state, e.g., whether the todos are empty.
If none of the previous checks are fulfilled, all todos will be displayed with the following code snippet:
return Expanded(
        child: ListView.separated(
          itemCount: doneState.todos.length,
          itemBuilder: (context, index) => Card(
            child: Padding(
              padding: const EdgeInsets.all(16.0),
              child: ListTile(
                title: Text(doneState.todos[index].title!),
                subtitle: Text(doneState.todos[index].description!),
                trailing: Row(
                  mainAxisAxisSize: MainAxisAxisSize.min,
                  children: [
                    Text(
                      "due at: ${DateFormat('dd.MM.yyyy').format(doneState.todos[index].dueDate!)}",
                    ),
(continues)
    const Gap(8.0),
    IconButton(
        onPressed: () => _deleteTodo(
            context,
            doneState.todos[index],
        ),
        icon: Icon(MdiIcons.trashCanOutline))
    ],
  ),
),
    separatorBuilder: (context, index) => const Divider(),
  ),
);
Expanded is a widget that tells the subordinate widget that it should take up the entire remaining space in the main axis of the superordinate widget. In this case, the underlying ListView should take up the entire remaining vertical space in the superordinate Column.
The ListView has a Builder property that is responsible for creating the children of the ListView and displaying them. The children essentially consist of a ListTile, a widget that specifies a specific structure for its children. In this way, you can add a title and a subtitle that will automatically and always be located on the left side of the widget. The Trailing property is used to add widgets at the end of the ListTile. Here we have added the completion date and a button for deletion. The delete button calls _deleteTodo, which in turn calls the deleteTodo method of the Cubit, thereby changing the state and redrawing the user interface.
Another interesting part of the code is adding Todos. When you press the FloatingActionButton, a dialog appears that queries some entries (e.g., title and description) and when you click on Save, the Todo is transferred to the Cubit and stored in the database.
The special widgets BlueShoeTextField and BlueShoeeDateField can be found in the Git Repository on GitHub.
And what does it all look like? Here are some screenshots:
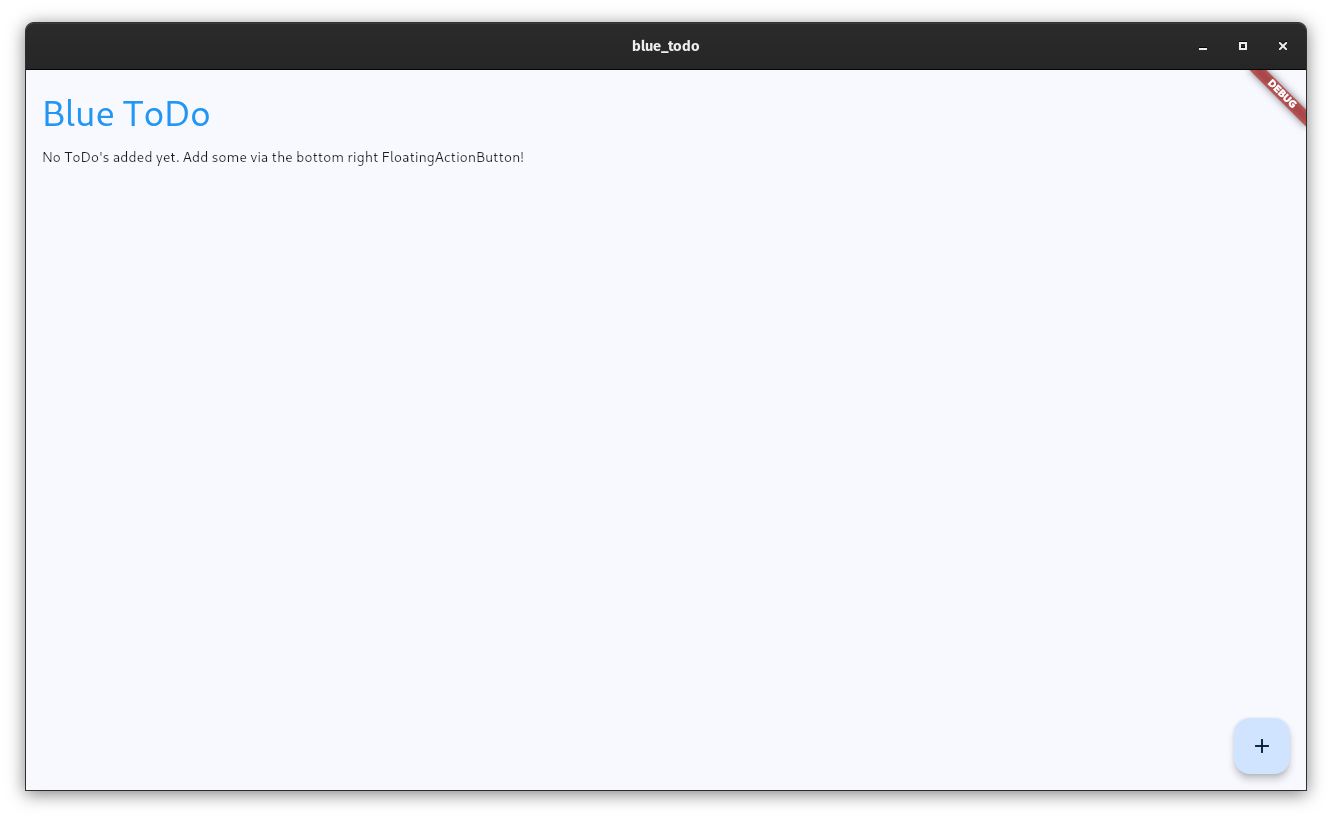
Without Todos
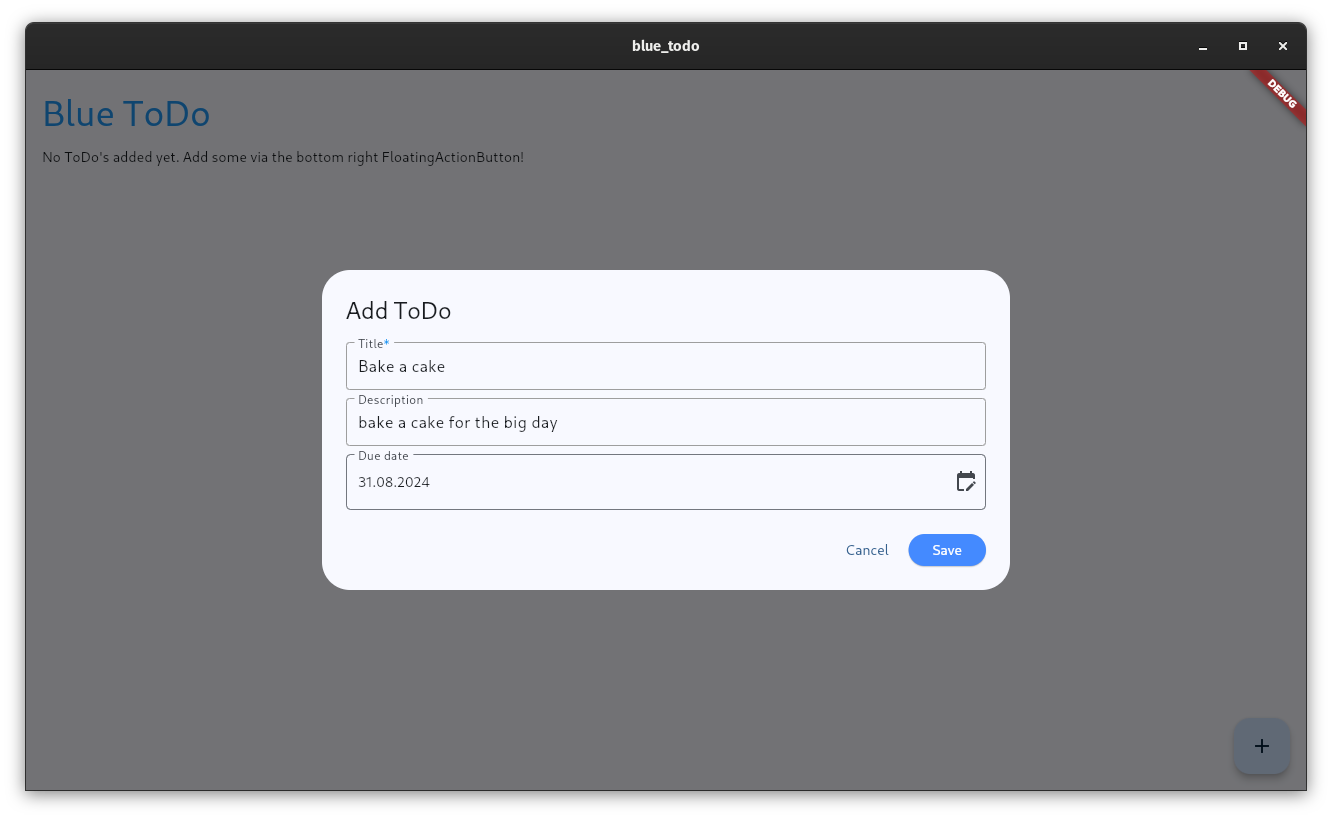
Adding a Todo
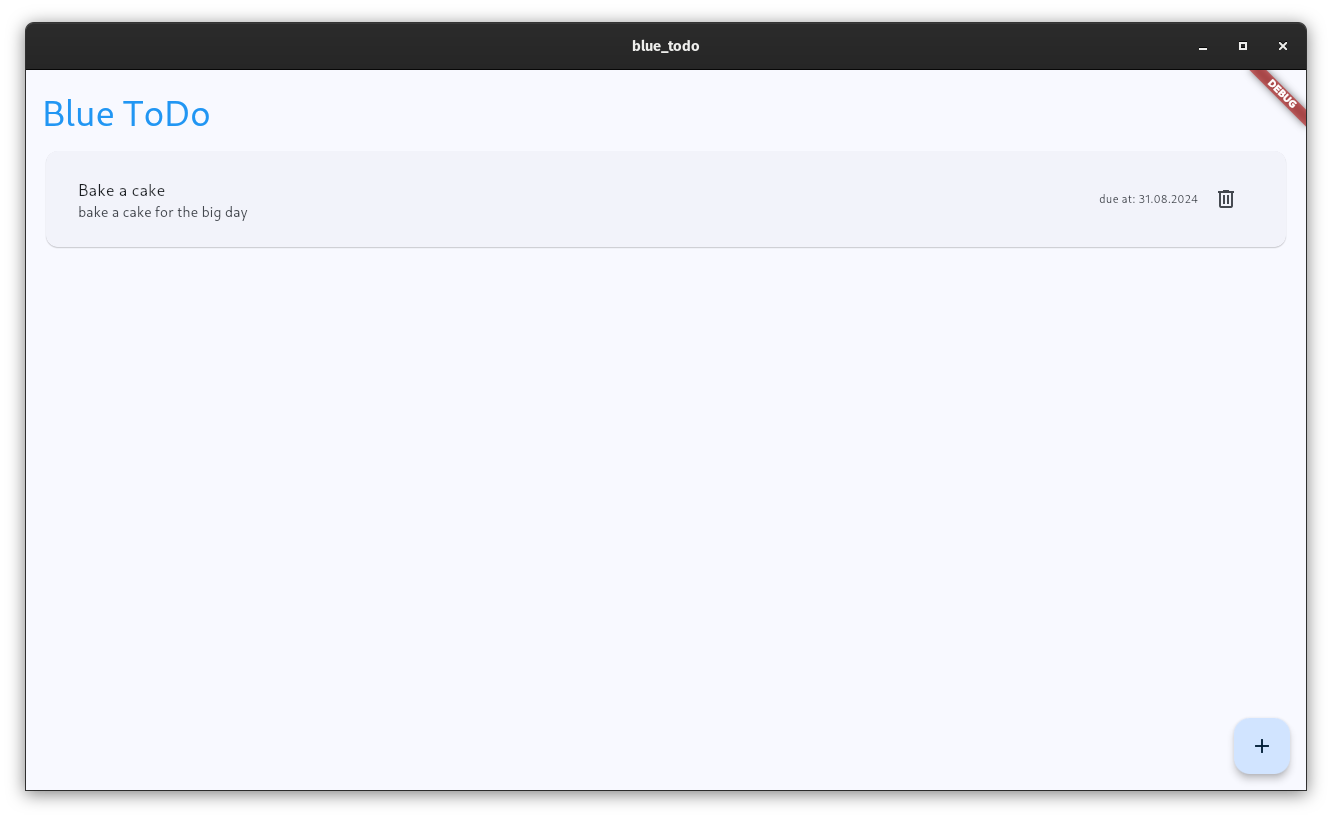
A todo is added
I hope this brief example has shown you that with Flutter you can quickly build versatile and beautiful apps!
Blueshoe x Flutter
At Blueshoe, we strive for highest performance and usability in our applications. With Flutter, we can keep this promise and fulfill all expectations of our customers.
If you are looking for someone for your next app, then don't hesitate to contact us!


