27.02.2023
Kubernetes for Development
Minikube vs. k3d vs. kind vs. Getdeck
What is the best Kubernetes tool for development in 2023? This article compares three of the most popular solutions. Getdeck, created by Blueshoe, is a new alternative to local Kubernetes development entering the market.
Table of contents
Introduction
In this article, we’ll compare three popular local Kubernetes development tools. In addition, Getdeck Beiboot is added to the comparison as a remote Kubernetes-based development environment.
The main focus of this blog post is the evaluation of DX (“developer experience”) in actual development scenarios. This is particularly important to keep in mind as you could potentially use these tools for production deployments as well. However, the important dimensions for the evaluation of these tools are very different between development and production hosting.
The following aspects are considered relevant for software development use cases:
- Ease of installation
- Ease of use, complexity
- Feature completeness (especially for development and production parity)
- Resource consumption
- Overall usability (the so-called developer experience, DX)
This list of evaluation criteria is not exhausting. There are also a few concerns that make the work with these tools appealing, like personal preferences. I won’t take a glance at all of these criteria in this article, though.
All of the tools are capable of providing the developer with a dedicated Kubernetes environment for learning Kubernetes, playing around, or solving development problems.
Minikube vs. k3d
Minikube
minikube is one of the most mature solutions on the market. When our team at Blueshoe started adopting Kubernetes in 2017, minikube was already available. The first version 0.1.0 was released on May 30, 2016, shortly after the initial commit on Github, on Apr 16, 2016.

minikube was started by a Kubernetes SIG, a special interest group, that recognized the need for local Kubernetes environments. Today, the SIG is very close to the Kubernetes development team and hence up-to-speed with the official Kubernetes code base.
TOOLS FOR THE CRAFT
E1: Kubernetes Development Environments
Michael and Robert talk about how we got from docker compose to truly developing with Kubernetes. They discuss the different challenges at hand and which tools can help to move development environments closer to the production setup.
Jack of all platform-trades
A very important difference between minikube and all other contestants is that it can deploy Kubernetes clusters with one of the multiple drivers. These drivers implement the way you run the Kubernetes cluster on a development machine: either based in a virtual machine (for example Hyper-V, KVM2, QEMU, or others) or in a container runtime (for example with Docker or Podman). When looking at minikube with the evaluation aspects from above, one can spot differences in the details between these drivers. Yet, in general, minikube abstracts the driver's implementation for the developer.
Hence, it’s more than likely that minikube can run Kubernetes for virtually any platform a developer is working on. Coming with a unified interface, minikube is a very platform-agnostic solution. If your team is working with Windows, macOS, Linux, or even more exotic platforms, it’s a great benefit to have all members use the same tool. They will be able to share knowledge more easily, provide scripts for automation and write documentation that covers all platforms equally.
A big plus for minikube is its comprehensive documentation. It not only contains technical references but also a long list of tutorials for many specific use cases and deployment scenarios.
Use all K8s features with minikube
With minikube a developer can use practically any required Kubernetes feature. Some of them must be enabled with the –feature-gates flag. This is a set of key-value pairs that describe feature gates for experimental features. Other features are controlled by the addons system of minikube. Addons can be integrated by 3rd party vendors. Here is a list of addons from my system.
|-----------------------------|--------------------------------|
|         ADDON NAME          |           MAINTAINER           |
|-----------------------------|--------------------------------|
| ambassador                  | 3rd party (Ambassador)         |
| auto-pause                  | Google                         |
| csi-hostpath-driver         | Kubernetes                     |
| dashboard                   | Kubernetes                     |
| default-storageclass        | Kubernetes                     |
| efk                         | 3rd party (Elastic)            |
| freshpod                    | Google                         |
| gcp-auth                    | Google                         |
| gvisor                      | Google                         |
[...]
| nvidia-gpu-device-plugin    | 3rd party (Nvidia)             |
| olm                         | 3rd party (Operator Framework) |
| pod-security-policy         | 3rd party (unknown)            |
| portainer                   | 3rd party (Portainer.io)       |
| registry                    | Google                         |
| registry-aliases            | 3rd party (unknown)            |
| registry-creds              | 3rd party (UPMC Enterprises)   |
| storage-provisioner         | Google                         |
| storage-provisioner-gluster | 3rd party (Gluster)            |
| volumesnapshots             | Kubernetes                     |
|-----------------------------|--------------------------------|
These addons are enabled with...
minikube addons enable [...]
...and allows a minikube cluster to provision that particular feature in the local development cluster. For example, if you need volumesnapshots, like we did when building the Getdeck Beiboot shelf feature, just run:
minikube addons enable volumesnapshots
That makes it very convenient to use such a feature without bloating each development cluster instance from the start. In addition, the same set of addons will be available across the team, given they all use the same version of minikube.
Minikube Profiles: multiple logical clusters on one dev machine
When we started adopting Kubernetes, we were looking for a solution that allowed us to manage multiple logical clusters on one development machine. In 2016/2017, minikube did not put much focus on that particular feature. It was only possible to spin up one cluster per machine, and there was only a single-node cluster configuration possible. That is why we at Blueshoe decided to work with k3d. However, minikube caught up with this important developer feature and does now support multiple so-called minikube profiles.
minikube profiles are logical clusters that can be started and stopped separately from each other. It allows a developer to have more than one Kubernetes-based development environment. Just think of multiple disjunct projects that require different Kubernetes API versions, features, or simply different workloads running in them. You can run:
minikube start -p myprofile1
and you will get a blank new cluster with a fresh profile that can exist along with other profiles.
k3d
k3d is more limited when it comes to deploying it on a development machine. From the very beginning, k3d only supported a local container runtime for running the Kubernetes cluster. Yet, as I mentioned before, it was always possible to manage multiple separate clusters for development on one host. That was a real killer feature, especially for Blueshoe, as we are running multiple different Kubernetes projects for several clients. Especially with our maintenance work, it is a must to have an up-to-head (don’t worry, I created that term) development environment, as well as a close-to-production stable environment at the same time. As a developer, I need to provide bug fixes in no time and drive the development of new features.
k3d is based on k3s, a lightweight Kubernetes solution that is developed by Rancher. However, k3d is not deeply affiliated with k3s and is driven by a community of developers.
The characteristic of k3s is that it replaces some of the Kubernetes default components, such as etcd, with less scalable and less resource-intensive alternatives (e.g. SQLite). In addition, the whole system is compiled into one very small binary executable (less than 40 MiB) which makes it very low on storage requirements, too. The base Kubernetes system k3s was originally developed for IoT and edge computing environments. I’d say, that makes it perfect for development environments, too, as these little resource requirements are a perfect fit. We will see the comparison of the resource consumption later in this article.
Since k3d is just a wrapper for k3s, it can focus on the developer’s experience. It comes with very good documentation, just like minikube, that also contains tutorials for certain use case scenarios. For example, you can find a development workflow example using Tilt and a build-push-test cycle using k3d’s container image-sharing capability.
Good for teams: Sharing k3d configurations
One great advantage that k3d provides (which minikube misses at this point) is that k3d provides a cluster configuration file (as of version 4.0.0). It allows development teams to persist the configuration of a k3d cluster to a local YAML file that can be shared across the team. This file contains the configuration for almost all parameters that make up a cluster, for example, the number of cluster nodes, the Kubernetes version, the locally mapped ports, registries, features, and many more. That file makes it very easy to spin up the same cluster configuration across the team without having the developer follow along with a readme or a script to set up their local Kubernetes cluster. You can run k3d cluster create --config mycluster1.yaml and everything will be provisioned as specified. In my eyes, that is much more simple than what you can currently do with minikube.
Don't worry about kubectl
With either solution, minikube and k3d, a developer will get its kubectl context automatically set to the newly created cluster. Both alternatives name their kube-context following the cluster name/profile name that was specified when creating the cluster. This way, it is very easy for the developer to start working without worrying about the kubectl configuration at all.
Less complexity, fewer CLI commands
As k3d does not provide the complexity of minikube, the CLI is much less comprehensive, yet straightforward. I’d say, for developers working with the CLI, this is a plus. Especially when using the k3d configuration file, I can spare most of the typing on command line interfaces and reduce the surface of the CLI to the few required commands: starting, stopping, and deleting a cluster.
I would suspect that there are only a few features missing in k3d, as they are not supported in k3s, but for 95% of the development work, it should be totally sufficient. Even the snapshot-controller was recently added to k3s.
Minikube vs. kind
Kind is another project driven by a Kubernetes SIG. At this point, I couldn’t find out why it is still maintained (I found a reason, but read on). Kind is an acronym for “Kubernetes in Docker'' and was born from the idea to run Kubernetes on a container runtime (instead of a virtual machine). However, nowadays, minikube also prefers to use Docker as a deployment option, so there is no difference between minikube and kind anymore regarding this important point. However, they put up a neat page in their documentation explaining kind’s principles and target use cases. I’d say it all boils down to automation.
Config files and K8s features
Just like k3d, kind also provides the possibility to use configuration files. Similar to k3d, you can run...
kind create cluster --config mycluster1.yaml
...to create a local Kubernetes cluster based on the given configuration.
Kind does also provide feature gates to enable experimental Kubernetes features and plenty of other configuration options.
Podman? Rootless? Kind!
Compared to minikube where running on Podman is considered experimental, kind is one leap ahead and provides solid Podman support. The project team even invested some serious effort in running kind in rootless mode, too. For whom this could be important, kind is currently the only solution. Yet, it comes with several limitations, of course.
Kind comes with a less complex CLI comparing it to minikube. The command line interface also renounces the emojis which can be a benefit. But that is a matter of taste.
Comparing the front page of both products, minikube claims to be “...focusing on helping application developers and new Kubernetes users.” whereas kind “was primarily designed for testing Kubernetes itself, but may be used for local development or CI”. I think this gives a certain foreshadowing of what it is all about.
Comparing minikube, k3d, and kind in 2023
Now let's have a head-to-head comparison of these three alternatives for local Kubernetes development in 2023.
Popularity
Popularity is an indicator of how secure the ongoing maintenance of a product is. A good currency to measure this is the number of GitHub stargazers:
- minikube: >25.8k stars on GitHub
- kind: >11.1k stars on GitHub
- k3d: >4.1k stars on GitHub
As you can see, all three contestants do already have significant popularity on GitHub. However, minikube is by far the most popular option. I would say that all three solutions will be maintained in perpetuity because they currently have a very vibrant community.
Performance evaluation
The following performance evaluation was conducted on a Ubuntu, running on an Intel Core i7 (8th Gen) with 16 GiB or RAM. Although I am working on Linux, I used Docker Desktop on my machine and hope to collect results comparable with other platforms, too.
Remark: Docker Desktop runs a QEMU-based virtual machine on Linux, too, just like on Windows and macOS. The Kubernetes in Docker Desktop was deactivated.
I used the following versions of the tools:
- minikube: minikube version: v1.26.1
- kind: kind v0.17.0 go1.19.2 linux/amd64
- k3d: k3d version v5.4.1
Cluster startup time
In this test case I am measuring the time from requesting a new local cluster until it is started. I did not specify any special configurations, just using the defaults.
I ran this test five times and took the best of all results so that there are no downloading container images in the time measured.
The startup times are as follows:
- minikube (docker): 29,448s
- k3d: 15,576 s
- kind: 19,691 s
The startup times of all contestants are quite close. If you have to, for example, download the required container images first this will probably impact the overall process more than the underlying bootstrapping process. Except for the kvm2 driver of minikube. This process is much more heavyweight and does involve the bootup of an entire virtual machine. I assume that VM-based drivers are not the first option for the majority of developers, anyway.
Cluster tear-down time
I measured the times for stopping and deleting a cluster. I run this test multiple times and took the best of all results:
- minikube (docker): 2,616 s
- k3d: 0,700 s
- kind: 0,805 s
All tools stop and delete their clusters very swiftly. No big difference between them.
Cluster resource consumptions
I started a local Kubernetes cluster and at about 120 s after the finished startup, I inspected the resource consumptions for an idling one-node cluster. I used the docker stats command for that.
Please note that I disabled traefik on k3d to get a comparable setup. Since k3d runs at least two containers, I aggregated the consumptions.
Here are the results:
- minikube with docker (CPUs=8, Memory=15681 MiB):
CPU: ~20% Memory Usage: ~680.8 MiB - K3d (CPUs=8, Memory=15681 MiB):
CPU: ~20% Memory Usage: ~502 MiB - kind (CPUs=8, Memory=15681 MiB):
CPU: ~20% Memory Usage: ~581 MiB
Looking at the results, you can spot some differences between minikube and k3d or kind. For a blank and idling cluster, minikube allocates about 35% more memory than k3d, and 17% more memory than kind. I suspect that with a growing number of workloads, the resource consumption of minikube will get to the limit of the development machine very fast.
In any case, I was very surprised by the CPU usage that went from 10% to 50% from time to time without anything going on in these clusters. That pattern occurred for any of the Kubernetes providers.
Usability and Developer Experience (DX)
Usability and DX are very complex topics and it’s difficult to come up with quantitative metrics. However, I would like to point out a few of my findings that I like or do not like about the tools.
All tools are currently available as CLI (command line interface) only. That’s fine for me and probably a good chunk of developers on Linux and macOS. As far as I can tell, only a few developers on Windows like working with a terminal. From their perspective, a CLI probably does not provide the best possible DX. There are a couple of GUIs (graphical user interfaces) around. I added my findings in the next chapter.
minikube
minikube comes with a CLI that employs a lot of emojis. That’s a very individual preference, but I find them a bit annoying. However, they can be disabled.
The installation is very simple, you can get it via brew, script, or download it as binary and put it manually to your path.
minikube makes it very easy and swift to create a new cluster. It’s just one command with two words: minikube start. That’s simple enough. How would you think to pass configuration options? Right! Directly as an argument to the start operation. One very important configuration is the Kubernetes API version. It doesn’t matter which version of minikube you have installed on your local machine, you can always select a different Kubernetes API version than the default. And that’s very simple and intuitive. Your production cluster runs on version 1.25.5, then you want to run:
minikube start --kubernetes-version=1.25.5
...and you will be provided with the correct API version.
Other basic cluster operations are likewise: halting the cluster, stopping or deleting it is always only one command.
Clean CLI, quick Kubernetes Dashboard
The command pallet of the minikube CLI is clean and relatable. If you are working with multiple clusters in parallel, either started or sleeping, you can always add the -p/--profile argument to most of the actions and run the requested action on the specified cluster.
How do you list all existing clusters on the machine? That’s a
minikube profile list
...and you will be presented with a list of created clusters.
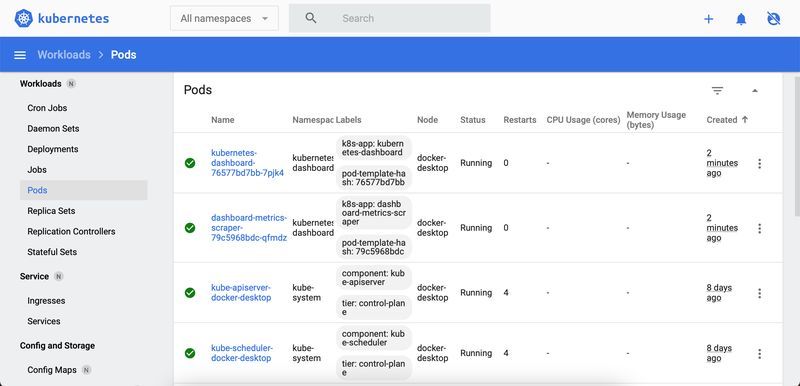
When you have a cluster running, you can always open up the official Kubernetes dashboard with minikube dashboard (for the default profile). Of course, you can always install the Kubernetes dashboard to any cluster, but this command is really a shortcut to get a visual interface to this cluster after a few seconds.
Add that ingress
If you need to expose a Kubernetes deployment or service to your local development machine, just use the networking and connectivity commands:
- minikube service: returns a URL to connect to a service
- minikube tunnel: connect to LoadBalancer services
One common component that needs to be enabled via addons is the ingress controller. Usually, that is the preferred way to expose an application. With minikube you don’t have an ingress controller available by default, instead, you have to provide it manually. Luckily, there is an addon with the well-known and widely adopted “nginx-ingress” available. Just run:
minikube addons enable ingress
and you can create ingress objects that will be served under http://192.168.49.2. Please note that the IP address of your cluster can be a different one. You can find it out with
minikube ip
Criticism
There is only one criticism I have about minikube: the poor automation options. There is no configuration file that I can just feed in the command to set up a whole cluster as specified. Instead, I need to run all those commands sequentially. That is a pity and can be improved in the future.
A command to generate the tab-completion script is available for many terminals, too.
k3d
The installation of the k3d CLI is very simple. You can get it via brew, script, or download it as binary and put it manually to your path. However, the CLI needs more time to get used to it. Compared to minikube, k3d does not provide so many features on the command line, yet you can realise almost all required setups with k3d just as well.
Fewer CLI options but ingress out of the box
A developer will miss most of the handy features that the minikube CLI provides but the k3d CLI misses. That’s not too much of an issue though. If you are a more experienced developer, you probably work with kubectl very efficiently and know other tools from the ecosystem like Helm or Kustomize. For example, if you need the Kubernetes dashboard, you have to install it via Helm (or any other installation method). That’s no big deal, but it’s not as convenient as with minikube. Once you create a cluster, your global kubeconfig context is set to point to the new cluster.
k3d comes with traefik as an ingress controller. It’s always installed, except you explicitly deactivate it using a configuration flag. At Blueshoe, we found it very helpful to have it always available as we didn’t have to handle that important feature during the development setup time.
Port mapping meh
Setting the port mapping to your local machine can be a bit cumbersome. For example, if you want to expose an application via ingress on port 8080 on your development machine you have to specify this during the cluster creation. And the notation is not super intuitive for developers. Have a look at the documentation. Create a cluster with a fixed set of port mappings like so:
k3d cluster create -p "8080:80@loadbalancer" -p "8443:443@loadbalancer" …
Other port configurations are possible as well, but from a DX perspective it’s not very convenient to recreate the entire cluster just because you forgot to map the ports.
If you just want to work as a developer in a team, you probably get a cluster configuration file anyway. With it, and the correct specifications, you will have a very good time setting everything up. You just have to run:
k3d cluster create --config myconfig.yaml
...and within a few seconds you will be all set. That’s fast and very convenient. A big DX plus for k3d.
A command to generate the tab-completion script is available for many terminals, too.
kind
kind is very similar to k3d in most aspects. Just like k3d and minikube, you can install it using popular packet managers, scripts and as a single executable.
If you know the handling of the k3d CLI already, you will probably be used to kind’s CLI very fast. The options are almost identical, and so are the limitations.
There is nothing much to add in this section.
Development Options
Getting your own code to run into one of the Kubernetes tools can be challenging and inconvenient. First, you need to build container images, as Kubernetes only allows running container instances. Usually, Kubernetes pulls these images from an external container registry (such as Dockerhub, quay.io, or a self-hosted registry). If a developer wanted to run some custom code, it would require a workload specification and a registry that serves the container image. This can lead to an enormous loss of efficiency.
Luckily, all tools provide some workaround or shortcuts to remove this barrier (at least to some degree)
Mounting local code
minikube and k3d provide the capability to mount code from the developer’s machine directly into the running Kubernetes node.
With k3d this is possible with the local path provisioner of k3s. A developer can create a PersistentVolumeClaim that points to a path on the host system. Subsequently, this PVC can be mounted into a container instance and used in the container process. This will allow you to either run a container process with the current code (restarting the container once the code changed) or start the container process with hot reloading capabilities. Of course, this is highly specific to a framework or process that is being run and has nothing to do with Kubernetes. However, this only works at the cluster creation time like so:
k3d cluster create my-cluster --volume /my/home/go/src/github.com/nginx:/data
Adding volumes after the cluster has been created and is running is still an open issue.
With the minikube mountcommand, exactly the same is possible. You can even mount storage volumes after creating the cluster. Instead of using a Kubernetes PVC, you can mount to code using the hostPath property of a Pod, which makes it a bit more convenient
Loading a local container image
A more practical and less invasive approach to run local code in minikube, k3d and kind is the load-image feature. Why less invasive? - As a developer, you don’t need to adjust the Kubernetes objects (Pods, PVCs, etc.) for your local environment, based on the paths that are potentially unique to your system (e.g. mounting home directories are usually different between developers). Instead, you make a container image available to your local cluster without the need for a dedicated container registry. That means, you build a local container image based on your current code (e.g. docker build . -t myimage) and transfer it directly into your local Kubernetes to run it.
That approach is leveraged by almost all Kubernetes development toolkits such as tilt.dev, devspace, and others. Watching for code changes, these kinds of development tools automatically run a build-load-execute cycle. This approach is slower than mounting local code with an adjusted container process, but at least it does not (always) modify the Kubernetes objects.
In order to do so with minikube, you run...
minikube image load
In k3d you load an image with...
k3d image import
and with kind it is...
kind load docker-image
...from your terminal.
There are a few other tools available, like ksync that copies code into containers running in Kubernetes, but with a more general technical approach. A great option for developers working with any kind of Kubernetes environment, either local or remote, is introduced in the next section.
The best alternative for local Kubernetes development
The options from above don’t make all required development features easily accessible. For example, overriding environment variables is not very easy as they can come from different Kubernetes objects: ConfigMaps, Secrets, Pod specifications, Downward API and others. A developer who is not used to working with Kubernetes may have a hard time fiddling around with environment variables.
The almighty debugger, that is not easily attached to a process running in Kubernetes, is not very handy with the options from above. The above mentioned options do have some other setbacks, too.
At this point Blueshoe decided to construct a more sophisticated development tool, that spares the developer from spending time in the build-load-execute cycle or get local directories to run in Kubernetes: Gefyra.
Gefyra does not only connect to local Kubernetes clusters based on minikube, k3d or kind. It connects to virtually any Kubernetes cluster that runs anywhere. This allows Gefyra users to create dedicated development clusters in the cloud while providing local coding experiences to the developers.
Gefyra runs the code on a local Docker runtime (without Kubernetes at all) but does some networking and process magic to connect the local container instance with a Kubernetes cluster. The process on a developer machine will feel like it would run directly within a Kubernetes namespace (including networking features) with the upside of having all common development tools available locally. This can drastically improve the development velocity while maintaining a very good dev/prod parity.
If you have an opinion about Gefyra, missing features or need to file a bug report, feel free to open an issue or discussion on GitHub.
Graphical User Interfaces and Docker Desktop
If you are looking for a graphical user interface for your local Kubernetes cluster, please have a look at K3x and minikube GUI. Both projects are in a very early stage of development as of the time writing this article.
The main goals of these projects are to allow the user to create, start and stop, and destroy Kubernetes clusters with a click of a button. In addition, it allows developers to manage the most important operations with keyboard shortcuts and to reduce the learning curve of using Kubernetes.
And then there is Docker Desktop which comes with its own Kubernetes solution. However, Kubernetes in Docker Desktop does not really provide any of the features that minikube, k3d, or kind provide. You can simply start and stop a Kubernetes cluster using a graphical user interface.
A cloud-based Kubernetes development environment with Getdeck
At Blueshoe, we realised that local Kubernetes clusters are a challenge with growing workloads. Especially on Windows and macOS, even a few development workloads in Kubernetes turn the development machine into a slow-walking zombie. That was very impractical, hence we decided to look for other solutions for our development teams. For the complex Kubernetes-native software architecture we are developing, it was not possible to create a shared cluster setup. Splitting up one physical cluster using namespaces is something that many development teams are currently doing. Instead, we wanted to provide dedicated, full-blown, on-demand Kubernetes clusters to our developers. But with all the features that a mature development organisation is demanding, such as lifecycle management, resource constraints, and so on.
We created Getdeck for that.
With Getdeck Beiboot, a team of developers only need to operate one physical Kubernetes cluster. The Beiboot operator spins up “virtual” Kubernetes clusters within the host cluster and manages their lifecycles. The creation of an ad-hoc Kubernetes environment takes about 20 seconds and does not consume any resources on a development machine.
In addition, the Beiboot Shelf feature allows developers to create pre-provisioned Kubernetes clusters off-the-shelf. That means, it only takes a few seconds longer and developers have a dedicated Kubernetes cluster running all required workloads for their tasks containing all the data that is required to match production infrastructure. This is not only convenient for development purposes but also for automated tasks in CI/CD scenarios.
And the best: these clusters are tunnelled to the local machine, so that it feels like they would run on the local host. That is very handy.
Getdeck now also comes with a graphical user interface: Getdeck Desktop.
It allows developers to manage Beiboot clusters in no time. They can establish a connection to it and work with it as it would run on their local machine, but without the computer blasting off.
You can easily test how this works with our free Getdeck-as-a-Service offer. Just download the desktop app, enter some ports, create a cluster and start developing in a virtual kubernetes cluster hosted and paid for by us. The cluster comes with the following restrictions:
- max. 4h cluster lifetime
- no session timeout
- max. 3 nodes (max. 2 cores, 6GB RAM, 50GB Storage)
- max. 1 cluster at a time
Closing Remarks
It is very difficult to pick a winner in this comparison. All three established solutions, minikube, k3d, and kind are very similar to each other. There are some pros and cons for any solution but nothing that really stands out. That’s good because it’s not really possible to choose the wrong tool, either. I like the overall usability of all of these tools, given they address a professional working environment. All of them are fast, easy to install, and quite easy to use.
I have a gut feeling that minikube is slightly ahead of all options and the closest to the official Kubernetes development roadmap. Especially, for a single (potentially inexperienced) developer the entry barrier seems quite low. Yet, it’s the option with the highest resource demands. I would recommend minikube to Kubernetes starters.
At Blueshoe, we have been very happy with k3d in the past. Especially if you run many different Kubernetes clusters, you will be happy about the lower resource consumption compared to minikube. If you are working in a team, the configuration files coming with k3d or kind will be a huge benefit for all.
For some of our automated test cases, we switched over to minikube, because of the --kubernetes-version argument. It’s dead simple to set the requested Kubernetes version and voila, it’s running. With k3d you have to take a look at the corresponding k3s Docker image to use.
In the long run, we actually don’t see local Kubernetes development as a sustainable option. Remote development environments are the future! Getdeck Beiboot will run all Kubernetes-based resources, and with tools like Gefyra, we enable developers to work in a real Kubernetes-based development environment.
If you want to know more about Kubernetes-based development follow me on LinkedIn, join our discord or drop us a line at Blueshoe.


